The Invitation Box Course
The Invitation Box Course is a step-by-step online course for wedding stationers and designers who want to elevate their business with luxury velvet invitation boxes.
You'll learn exactly how we design, build, and sell our premium invitation boxes to create an unforgettable client experience and increase the value of your work.
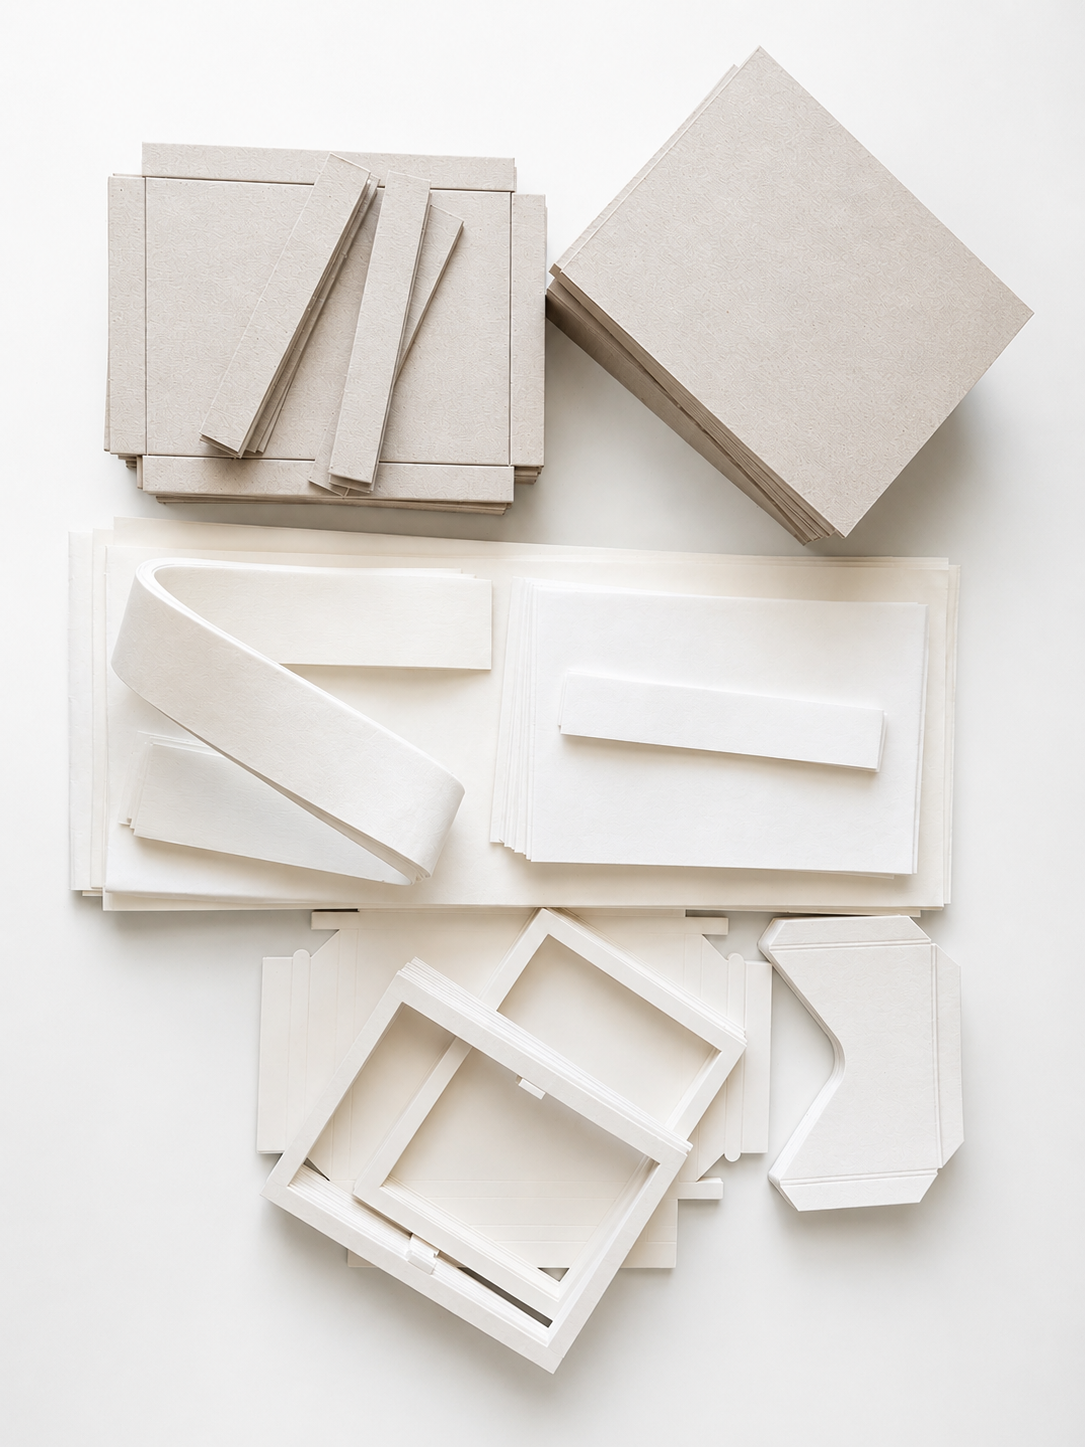
Inside the course, you'll get access to our complete production process, downloadable templates, supplier list, detailed video tutorials, and a pre-cut box kit so you can build your first box alongside us.
Don't forget to email your delivery details to info@letteringbygrg.com so we can send your material kit straight to your home and you can follow along with the course from day one!
-
-
Lesson 1: Our Story. How the incitation box was born
Discover the story behind our signature invitation boxes and how they transformed from a real client need into a luxury product that elevates the entire wedding invitation experience. In this lesson, we’ll explore why emotion, storytelling and presentation matter before we begin building the box itself.
Discover the story behind our signature invitation boxes and how they transformed from a real client need into a luxury product that elevates the entire wedding invitation experience. In this lesson, we’ll explore why emotion, storytelling and presentation matter before we begin building the box itself.
-
Lesson 2: What the box does for your client. The unboxing experience as a luxury signal
Explore why the unboxing moment is one of the most powerful parts of a luxury invitation experience. In this lesson, we’ll look at how presentation, anticipation and emotional detail can completely change the way guests perceive a wedding before the celebration even begins.
Explore why the unboxing moment is one of the most powerful parts of a luxury invitation experience. In this lesson, we’ll look at how presentation, anticipation and emotional detail can completely change the way guests perceive a wedding before the celebration even begins.
-
Lesson 3: What the box does for your business
Understand how invitation boxes can elevate your brand positioning and increase the perceived value of your work. In this lesson, we’ll explore how this product helps you move beyond traditional stationery, attract luxury-focused clients, create stronger content, and build a more premium, experience-led business.
Understand how invitation boxes can elevate your brand positioning and increase the perceived value of your work. In this lesson, we’ll explore how this product helps you move beyond traditional stationery, attract luxury-focused clients, create stronger content, and build a more premium, experience-led business.
-
Lesson 4: Who this course is for
Learn who this course is designed for and what you’ll be able to create by the end of it. In this lesson, we’ll walk through how luxury invitation boxes can help creatives, stationers and wedding professionals elevate their offer, master the construction process and confidently introduce a premium product into their business.
Learn who this course is designed for and what you’ll be able to create by the end of it. In this lesson, we’ll walk through how luxury invitation boxes can help creatives, stationers and wedding professionals elevate their offer, master the construction process and confidently introduce a premium product into their business.
-
-
-
Lesson 1: A deep Dive into the dimensions
Understand why precise dimensions are essential when creating a luxury invitation box. In this lesson, we’ll explore how proportions, depth and internal structure affect the way each piece sits inside the box, helping you create a balanced, functional and premium presentation that feels intentional from the moment it is opened.
Understand why precise dimensions are essential when creating a luxury invitation box. In this lesson, we’ll explore how proportions, depth and internal structure affect the way each piece sits inside the box, helping you create a balanced, functional and premium presentation that feels intentional from the moment it is opened.
-
Lesson 2: The lid pocket
Learn how the lid pocket enhances both the functionality and luxury presentation of the invitation box. In this lesson, we’ll walk through how to build, align and secure the pocket with precision, creating a clean, elegant and professional finish that keeps each detail beautifully integrated inside the box.
Learn how the lid pocket enhances both the functionality and luxury presentation of the invitation box. In this lesson, we’ll walk through how to build, align and secure the pocket with precision, creating a clean, elegant and professional finish that keeps each detail beautifully integrated inside the box.
-
Lesson 3: Materials and structure
Discover the essential materials and structural foundations behind a luxury invitation box. In this lesson, we’ll explore how boards, velvet, ribbon, adhesives and tools work together to create a solid, refined and professional box that feels premium both visually and in the hands.
Discover the essential materials and structural foundations behind a luxury invitation box. In this lesson, we’ll explore how boards, velvet, ribbon, adhesives and tools work together to create a solid, refined and professional box that feels premium both visually and in the hands.
-
Lesson 4: How to find suppliers and materials
We'll go through the different materials and suppliers we use to create our luxury invitation boxes.
You have two options: you can order the exact same materials directly from us, or source them yourself using our recommended supplier list. We have carefully selected these suppliers because they offer materials that are either identical or very close in quality and appearance to the ones we use in our studio.
We'll go through the different materials and suppliers we use to create our luxury invitation boxes.
You have two options: you can order the exact same materials directly from us, or source them yourself using our recommended supplier list. We have carefully selected these suppliers because they offer materials that are either identical or very close in quality and appearance to the ones we use in our studio.
-
-
-
Lesson 1: Build the box
Learn how to source the right tools and materials to build luxury invitation boxes with confidence. In this lesson, we’ll guide you through the supplier side of the process, helping you avoid unnecessary trial and error and start working with the same professional foundations used throughout the course.
Learn how to source the right tools and materials to build luxury invitation boxes with confidence. In this lesson, we’ll guide you through the supplier side of the process, helping you avoid unnecessary trial and error and start working with the same professional foundations used throughout the course.
-
Lesson 2: Lid Pockets template
In this module, we will create the lid pocket templates for the inside of the invitation box.
You will learn how to print, cut and score two different pocket options, so you can choose the style that best fits your design and the stationery pieces you want to include.
This is a simple but important step, as the lid pocket helps keep the cards beautifully organized and adds a refined, functional detail to the final box.
In this module, we will create the lid pocket templates for the inside of the invitation box.
You will learn how to print, cut and score two different pocket options, so you can choose the style that best fits your design and the stationery pieces you want to include.
This is a simple but important step, as the lid pocket helps keep the cards beautifully organized and adds a refined, functional detail to the final box.
-
Lesson 3: Chipboard inner box template
In this module, we will create the chipboard inner box template, which will form the main rigid structure of the box.
You will learn how to transfer the printed template onto chipboard, cut the shape with precision, and score the inner fold lines to prepare the piece for assembly.
This step is essential to achieve a clean, strong and well-defined structure before moving on to the construction of the box.
In this module, we will create the chipboard inner box template, which will form the main rigid structure of the box.
You will learn how to transfer the printed template onto chipboard, cut the shape with precision, and score the inner fold lines to prepare the piece for assembly.
This step is essential to achieve a clean, strong and well-defined structure before moving on to the construction of the box.
-
Lesson 4: Cardstock inner box template
In this module, we will create the cardstock inner box template, either by printing it on A3 or joining two A4 sheets together.
You will learn how to cut and score the template accurately so the inner box folds cleanly and fits perfectly inside the main structure.
In this module, we will create the cardstock inner box template, either by printing it on A3 or joining two A4 sheets together.
You will learn how to cut and score the template accurately so the inner box folds cleanly and fits perfectly inside the main structure.
-
Lesson 4.1: Cardstock inner box template with Silhouette
In this module, we will prepare the cutting file using Silhouette Studio.
You will learn how to open and position your design, select the correct cutting mode, adjust the settings according to your material, and send the file to the machine.
This step will help you cut your templates more accurately and efficiently, especially when working with repeated pieces or larger productions.
In this module, we will prepare the cutting file using Silhouette Studio.
You will learn how to open and position your design, select the correct cutting mode, adjust the settings according to your material, and send the file to the machine.
This step will help you cut your templates more accurately and efficiently, especially when working with repeated pieces or larger productions.
-
Lesson 5: Cardstock rectangle template
In this module, we will create the cardstock rectangle templates that will hold the invitation inside the finished box.
You will learn how to cut two matching pieces, create the inner openings, and preserve the small side flaps that keep the invitation securely in place.
You’ll also see how to cover this piece with velvet or linen for a more refined, luxury finish.
In this module, we will create the cardstock rectangle templates that will hold the invitation inside the finished box.
You will learn how to cut two matching pieces, create the inner openings, and preserve the small side flaps that keep the invitation securely in place.
You’ll also see how to cover this piece with velvet or linen for a more refined, luxury finish.
-
-
-
Lesson 1: Why this product can transform your business
Understand how luxury invitation boxes can elevate your creative business by increasing the perceived value of your work, strengthening your portfolio, creating more impactful content, and helping you attract higher-end clients who truly value craftsmanship and detail.
Understand how luxury invitation boxes can elevate your creative business by increasing the perceived value of your work, strengthening your portfolio, creating more impactful content, and helping you attract higher-end clients who truly value craftsmanship and detail.
-
Lesson 2: Exclusive offer for students
Discover the exclusive pre-cut invitation box kits available for course students, designed to simplify production and help you create luxury boxes with confidence. In this section, we’ll explain what each kit includes, how it saves preparation time, and the minimum order quantity required.
Discover the exclusive pre-cut invitation box kits available for course students, designed to simplify production and help you create luxury boxes with confidence. In this section, we’ll explain what each kit includes, how it saves preparation time, and the minimum order quantity required.
-
Lesson 3: Final recap
A final recap of everything learned throughout the course, from structure and materials to construction, finishing techniques and professional workflow, while reflecting on the emotional value behind luxury invitation boxes and their role within a wedding story.
A final recap of everything learned throughout the course, from structure and materials to construction, finishing techniques and professional workflow, while reflecting on the emotional value behind luxury invitation boxes and their role within a wedding story.
-
What You'll LearnExpert-Backed Content
Discover why the invitation box is more than packaging: it elevates the client experience and increases the perceived value of your work.
Welcome
Follow the full step-by-step process to build the box, from cutting and scoring to wrapping, assembling and finishing.
Production

Monica & Philip
Understand the structure, dimensions, materials and details that make a luxury invitation box feel balanced and refined.
Anatomy of the box
Recap the process, understand how this product can elevate your business, and access exclusive pre-cut box kits for students.
Outro & Resources
Frequently Asked Questions
Do I need to buy the pre-cut kits to complete this course?
Not at all. The kits are simply there to help you build alongside the lessons and save time on your first box. Our goal is to teach you the techniques so that you can confidently produce your own boxes from scratch using the templates provided.
How do you recommend cutting the box materials?
If you're not purchasing the pre-cut kits, we highly recommend using a guillotine (paper cutter) for the best results. Even an A3-sized guillotine is a fantastic investment and will make production much faster, easier, and more accurate. An electric cardboard cutter is another great option, especially if you'll be making boxes regularly.
If you're only making one or two boxes, you can simply print the template, tape it securely onto your board, and cut everything by hand using a sharp craft knife and a metal ruler.
We've also added some cutting tool recommendations to the PDF guide to help you choose the best option for your needs.
Where can I find the templates?
The printable PDF templates and Adobe Illustrator (.AI) files are available underneath each lesson.
If anything appears to be missing or you're unable to access a file, simply send us an email at info@letteringbygrg.com, and we'll send it over to you straight away. We're always happy to help!
How much velvet or linen do I need for each box?
Every student receives a physical kit, making it easy to measure exactly how much fabric is required.
As a general recommendation, we suggest measuring your first kit once you've completed it and using that as a reference for future production, especially if you're making boxes in different sizes.
To make one single box, a rectangle of 11 x 29 inches (approx. 28 x 74cm) of fabric will be optimal for the 4 pieces required, with minimal cut-off/excess.
When should I apply foil to the velvet?
If you'd like to add gold foil, a monogram, or any other printing to the velvet fabric, we recommend doing this before attaching the fabric to the box. This gives you the cleanest, most professional finish and avoids applying heat or pressure to the completed box, which could cause it to warp or become damaged.
We don't cover the foiling process in this course because it requires specialised equipment, such as a Hot Foil Stamping Machine. There are many different machines available online to suit a range of budgets, so you can invest in one whenever you're ready.
If you're looking for a simpler alternative, Etsy offers a wide variety of beautiful pre-made embroidered monograms and letters. These can easily be applied to the finished box after assembly and create a luxurious, personalised finish without the need for specialised equipment. It's a fantastic option if you're just getting started or aren't ready to invest in hot foil stamping yet.
How long should I wait for the glue to dry?
Drying times will vary depending on the adhesive you choose. For the glue used throughout this course:
- Initial grip: approximately 20–30 minutes
- Full cure: approximately 24–48 hours
What size invitation fits inside the box?
The templates included in this course are designed to fit a standard 5 × 7 inch invitation (approx 13cm x 17.8cm), along with the accompanying inserts shown throughout the lessons.
Which type of Velvet Material do you recommend for the Boxes?
For our high-end invitation boxes, we use a suede velvet (short-pile). It offers: An elegant appearance, Excellent wrapping properties around rigid corners, and great results with hot foil stamping.
Traditional long-pile velvet can look luxurious, but it's more difficult to wrap neatly around sharp corners and is more prone to marking.
When searching for Velvet materials online, we’d recommend using the term “Suede Velvet for Bookbinding”.
Can I use different fabrics?
Yes! Although we demonstrate the process using velvet, the same techniques can also be applied to linen, and many other fabrics which are suitable in book binding.
Always test your chosen material first, as thickness and stretch can affect the finished result.
Will you sell box structures without fabric?
We're currently considering offering additional kit options based on student feedback.
One idea we're exploring is supplying pre-cut box structures without fabric, allowing students to use their own materials and colours.
Please message us if you are interested!
How should I price these boxes for my clients?
Pricing will vary depending on your country, target market, level of craftsmanship, and business model, so there isn't one "correct" formula.
As a general guideline, we typically aim for approximately double our total production cost, plus enough to cover our labour, design time, overheads, and profit.
For example:
- Total production cost: €19
- Retail selling price: approximately €39 per box
Will the course be updated over time?
Yes! This course isn't something we intend to launch and leave untouched.
We're continually collecting feedback from students and will be adding new lessons, FAQs, resources, and improvements over time to make it as valuable as possible.